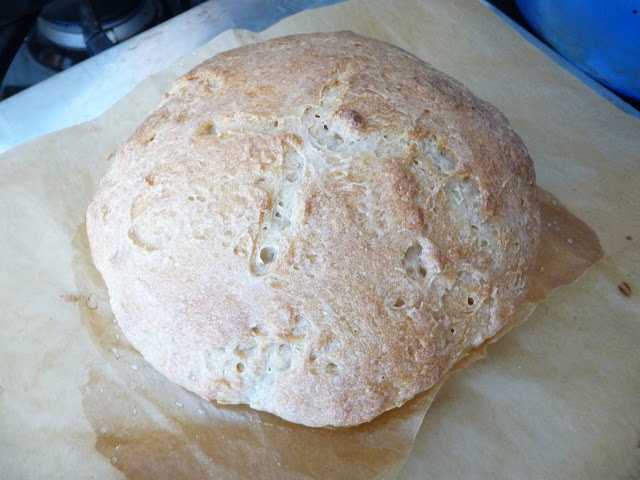
Sourdough Boule
Hi fellow dabblers...sorry to have left you hanging for a little bit. Today, I wanted to share a new hobby I have picked up...making sourdough bread. Sourdough bread is one of my all-time favorite things. Tangy, soft, chewy, crispy crust....serve it savory, sweet or plain...I love sourdough.
A few months ago I was reading a bread feature in a magazine, and got inspired to start making more bread at home. I always get disheartened when I go down the bread aisle at the grocery store, or look at the labels in the bakery. They too often contain unnecessary or unidentifiable ingredients. I have gotten into being in control of the ingredients I use and how they are handled...plus, the smell of sourdough bread baking in the oven is intoxicating, and well worth the work to make your own.
So...after some research, I purchased a sourdough starter from King Arthur Flour. I also purchased the ceramic crock pictured below to keep my starter in.
I've become rather fond of my starter, it's a bit like having a pet...albeit a low maintenance one. You have to feed your starter once a week to keep it alive, and watching it grow is like a fun science experiment. I'm hooked on sourdough making, and perhaps you will be too.
Here is the recipe I have been using:
Tangy Sourdough Bread
Ingredients:
-1 c fed sourdough starter
-1 1/2 c warm water
-2 tsp sea salt
-1 tbsp sugar
-5 c unbleached all-purpose flour (I use King Arthur brand)
Instructions:
1. Pour the cup of fed starter into a large bowl. Add 3 cups of flour and the warm water to the starter. Beat the starter, flour and water together vigorously.
2. Cover the mixing bowl with plastic wrap and a kitchen towel, let rest at room temperature for 4 hours. After 4 hours, refrigerate the dough overnight (12 hours).
3. Remove the bowl from the refrigerator and add the remaining flour, salt and sugar. Knead the dough to form a smooth dough.
4. Cover dough with plastic wrap and a kitchen towel, allow it to rise for another 5 hours until it is puffy and has large air bubbles.
5. Divide the dough into two equal parts. Shape into two round loaves. Place on a baking sheet and cover with plastic wrap and kitchen towel. Allow dough to rise for another 3 hours.
6. Preheat oven to 425°F.
7. Using a sharp knife, slash loaves on top. Using damp hands, lightly moisten dough.
8. Bake until loaves have a golden brown crust, about 30 minutes.
9. Cool bread on racks.
10. Enjoy :)
Pictures and Tips:
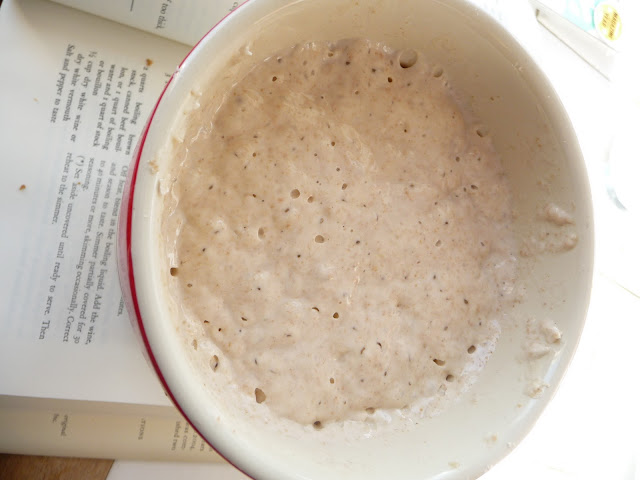
Step 1: This picture should explain the science-experiment feel to this whole process. Sourdough gets its great tang from fermentation... your starter is alive. "Fed starter" means ready to use. If your starter has been in the refrigerator, you should take it out 4 hours prior to starting this recipe. Feed it with 1 c of flour and 1/2 c warm water. Then let it sit on the counter, the starter is ready to use when bubbles have formed on the top. It will look like this:
Beat the starter, water and 3 cups of flour together vigorously...think of what it looks like when the metal hook of your bread machine is doing the kneading work for you. You need to create that effect. This dough has a wet consistency, and is very sticky...so get out those arm muscles and take out some frustration. Mine looks like this:
Step 2. After the dough has rested for 4 hours, you should see bubbles forming on its surface. This usually makes me want to go..."it's alive!" in a creepy Frankenstein, horror-film voice....the joy of baking in your own kitchen, right?
Place the dough back into the refrigerator to rise overnight. Keeping the dough cool slows down the rising process. This allows for a prolonged fermentation...which is where all that delicious flavor comes from.
Step 3. Add the remaining ingredients and knead until smooth.
Step 4. Allow the dough to rise again. This time it will gain quite a bit of volume and will be very puffy with large air bubbles:
Step 5. Divide the dough into two equal parts and shape into round loaves. The best way to do this is to tuck the dough into itself using your hands. Place the loaves on a parchment-lined baking sheet.
Step 7. Rub the loaves down with water before they go into the oven. The moisture on the outside helps create a crispy crust. I love the texture contrast this creates...crunchy crust and soft, chewy interior. Slash the loaves using a sharp knife, make whatever design you like.
Steps 8 and 9. Bake the loaves until they are golden brown. Cool on an oven rack. If you leave the loaves on the baking sheet the bottom of the bread will not be able to ventilate and moisture will condense there...ruining the crispy crust.
Step 10. Enjoy! The best step...my favorite way as of late is to dip the sourdough in a mixture of extra virgin olive oil, balsamic vinegar, parmesan cheese, black pepper and sea salt.
I also love it with butter and honey. You really can't lose. Whatever type of bread you choose, give making bread at home a go. Your kitchen will be filled with the intoxicatingly fantastic smell of fresh baked bread and your taste buds will love you.
Have fun. Thanks for visiting.
-The Delicious Dabbler
ps. I just returned home from a trip to Paris, France. Next post will detail all of the delicous dabblings I partook in there....think bread, butter and pastries :)


No comments:
Post a Comment