Thursday, April 28, 2011

Lemon Chiffon Pie


As promised, here is the Lemon Chiffon Pie recipe that was featured on my last blog post. I love this recipe because it is light and fluffy...it has the sweetness you want from a dessert, but it also has a great tart punch from the fresh-squeezed lemon juice and lemon zest. This dessert is the perfect complement to a lovely spring or summer meal....if only Minnesota weather would cooperate!

Lemon Chiffon Pie


Ingredients:
-1 c sugar
-1 envelope unflavored gelatin
-2/3 c water
-1/2 c lemon juice
-1 tsp lemon zest
-4 eggs, separated
-1/2 tsp cream of tartar
-1 prepared pie crust

Instructions:
1. Juice and zest lemons. Separate eggs.
2. Prepare an ice bath.
3. In a medium-sized sauce pan, combine 1/2 c sugar, gelatin, water, lemon juice, lemon zest and 4 slightly-beaten egg yolks.
4. Cook over medium heat, stirring gently and constantly, until the mixture boils. Continue to cook for one minute.
5. Cool the mixture in the ice bath until it forms small mounds when tested with a spoon. Remove from ice bath.
6. Prepare meringue. Using an electric hand or stand mixer, beat eggs until slightly frothy. Add cream of tartar.
7. Continue beating and begin to add in remaining 1/2 c sugar in small additions. Beat until stiff peaks form.
8. Fold cooled lemon mixture into meringue in small additions.
9. Pour lemon chiffon filling into prepared pie crust.
10. Refrigerate pie for at least two hours to allow filling to set up.
11. Garnish and enjoy!

Pictures and Tips:
Step 1. Here is my juicing/zesting setup....you'll need a juicer and a microplane for zesting.


Juice the lemons. To get 1/2 c of lemon juice, I used 3 1/2 medium sized lemons.


Use a microplane to zest the lemon. Make sure not to push too hard. The white part of the peel has a bitter flavor, so only zest the yellow part. I strongly prefer to use organic fruit, especially when you are zesting. A bulk of the chemicals used to grow non-organic fruit reside in the peel of the fruit...you don't want to release all that grossness into your pie.


Separate the eggs into two bowls. Be careful with this process. If you get any yolk into the whites, your meringue will not work.


Step 2. Prepare an ice bath. This will be used to quickly cool the lemon filling so you want it ready to go.


Step 3. Combine a 1/2 c of sugar with the gelatin, water, egg yolks, lemon juice and lemon zest in a medium-sized saucepan.


Step 4.  Cook the lemon mixture over medium heat. Stir it gently and constantly until the mixture comes to a boil. After the mixture begins to boil, continue to cook for one minute.


Step 5. After one minute, place the saucepan into the icebath.


Allow the mixture to cool in the icebath until it forms small mounds when tested with a spoon. Remove the saucepan from the icebath.


Step 6. Prepare the meringue. I used an electric hand mixer. Place the egg whites into a medium-sized bowl and beat them at a low speed until they begin to get frothy (bubbles will begin to form). After the egg whites begin to froth, add the cream of tartar.


Step 7. After you add the cream of tartar, continue to beat the egg whites, increasing the speed. When very soft peaks begin to form, start to add the sugar. You don't want to add all of the sugar at once...sprinkle it in slowly as you continue to beat the egg whites.


Beat the egg whites until stiff peaks form.


Step 8. Fold the lemon mixture into the egg whites a little at a time. Folding allows you to incorporate ingredients into egg whites without deflating all of the air bubbles you created by beating them.


Step 9 & 10. Pour the chiffon into the prepared pie crust and spread it out evenly with a rubber spatula. Place the pie in the refrigerator and let it chill for at least two hours.


Step 11. Garnish and enjoy. My favorite garnish is a piece of lemon peel. I use a fruit/veggie peeler to get large strips of peel. I like that this garnish quickly lets people know what flavor of deliciousness they are in for. You could also garnish each piece with a dollop of whipped cream and some grated zest.


I hope you enjoy making and eating this recipe. Thank you for visiting.

-The Delicious Dabbler

Tuesday, April 26, 2011

Grandma's Perfect 9'' Pie Crust


Perfect pie crust is an ellusive, but crucial component to any good pie. A pie crust must be light and flaky, but sturdy enough to hold up to filling. It can't be too chewy or tough, or a great pie filling is ruined. I have been lucky enough to eat perfect pie crust for my entire life because my grandma is the best pie maker around.

I have mentioned before that my grandma is the reason I got into baking. I love being in her kitchen and have so many wonderful memories of us making delicious treats together. She has been following my blog and I asked if she would be willing to share this recipe and her pie-making secrets . To my delight, she agreed. Enjoy this recipe and the tips that follow. Thanks grams!


Grandma's Perfect 9" Pie Crust


Ingredients:
-1 1/3 c all-purpose flour
-1/2 tsp finely ground sea salt
-1/2 c + 1 tbsp shortening
-2 to 3 tbsp ice water

*Grandma's Note: This recipe can be doubled for a 2-crust 9'' pie, but should never be increased by more than that. If you are making many pies, make the crusts in individual batches. Making them in bulk will not give you the best results.

Instructions:
1. Preheat oven to 375°F.
2. Carefully measure the flour into a medium-sized bowl. Sprinkle the sea salt over the flour.
3. Add the shortening to the dry ingredients. Using a pastry cutter, cut the shortening into the dry ingredients until the mixture has a gravel-like texture.
4. Add 1 tbsp cold water. Mix the dough with your hands. If the dough comes together, do not add anymore water. If the dough does not come together, add 1 tbsp of water at a time, mixing with your hands after each addition. You should not need to add for than 3 tbsp of water. Form dough into a round ball.
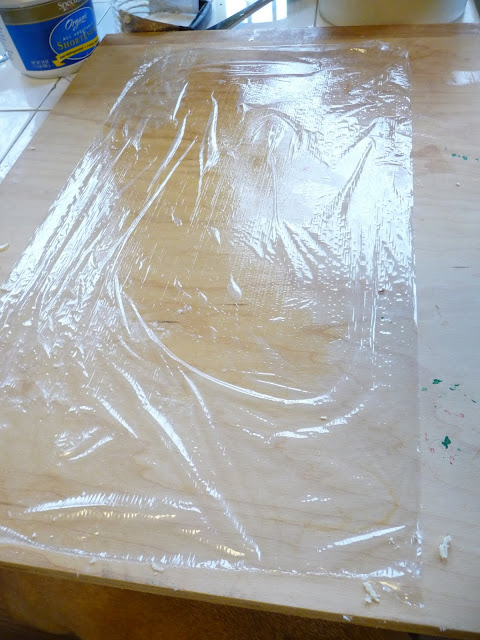
5. Lightly dampen a flat surface and cover it with a long sheet of plastic wrap. Place the dough ball on the plastic wrap and cover it with an additional sheet of plastic wrap.
6. Flatten the dough into a circle with your hands, then roll the dough out until it exceeds the circumference of your pie dish by at least 1/2".
7. Remove the top layer of plastic wrap. Transfer the pie crust to the pie dish and press into place.
8. Pinch the pie crust onto the edge of the pie dish. Trim the edges and poke several holes into the crust using a fork.
9. Bake the pie crust until the edges are lightly golden. (12-15 minutes)
10. Cool the pie crust on a rack until it reaches room temperature.
11. Fill the pie crust with something delicious and enjoy!


Pictures and Tips:


Step 2. Measure the flour into a medium-sized bowl. Sprinkle the sea salt over the flour so it is distributed evenly.


Step 3. Add the shortening into the flour and salt mixture. 


Using a pastry cutter, cut the shortening into the dry ingredients until the texture resembles small pieces of gravel. The idea here is to incorporate the shortening evenly into the flour mixture.


*Grandma's Note: Use your hands to check the dough at this stage. No water has been added to the dough yet, but it still comes together. This is why it is very important to add your water slowly...the dough doesn't need much water, and if you over do it...you will have tough pie crust.


Step 4. Sprinkle 1 tbsp of ice cold water over the flour mixture.


Using your hands, mix the water into the dry ingredients. You can see that the dough is starting to come together. The picture above shows what my dough looks like after the first addition of water....getting there, but not quite coming together completely.


Add another tbsp of water and mix with your hands. I added a second tbsp and was able to shape my dough into a round ball. As I mentioned in the instructions, you should not need more than 3 tbsp of water. 


*Grandma's Note: If you feel like your dough is close to coming together completely, add your water in 1/2 tbsp increments to make sure you don't add too much. Also, from this point on, you want to work as quickly as possible so that your dough does not dry out.


Step 5. Lightly dampen a flat surface and cover it with a large sheet of plastic wrap. Dampening the surface helps the plastic wrap stick and will make your life easier. 


Place the dough ball in the middle of the plastic wrap and cover it with an additional piece of plastic wrap.


*Grandma's Note: This process may seem a bit odd, but it allows you to roll the dough out easily without adding additional flour. If you rolled your dough out on a floured surface, the additional flour would throw off the proportions in your recipe and your crust would become tough. The plastic wrap also makes it easy to transfer the dough into the pie dish.


Step 6. Using your hands, flatten the dough ball into a rough circle.


Using a rolling pin, roll the dough out until you have a 1/2" of clearance around your pie shell. You can test the size by placing the pie shell on top of the rolled out dough.


Step 7. Remove the top layer of plastic wrap. Place your pie dish directly next to your pie dough.


Using the plastic wrap, lift the pie dough up and into the pie shell. 


Before you remove the plastic wrap, position the dough into place in the pie dish. After you have nestled the crust into place, remove the plastic wrap.


Step 6. Using your fingers, secure the pie crust to the pie shell by lightly pinching the dough. Work your way around the pie shell. 


Using a sharp knife, trim the excess dough so that you have a clean edge all the way around.


Using a fork, prick holes in the edges and bottom of the pie crust. This will allow steam to vent and prevent your pie crust from bubbling up while it bakes. If you have pie weights, you could use them here instead of making the holes.


*Grandma's Note: On a small baking sheet, press the trimmings from the edges together and sprinkle them with cinnamon and sugar. Bake in the oven with the pie crust for a delicious snack.


Step 9. Bake the pie crust until the edges are lightly golden. Make sure to keep an eye on your crust...because of the high fat content in the crust, it can go from delicious to devastatingly burnt in a short period of time. 


Step 10. Cool the pie on a rack until it reaches room temperature.


Step 11. Fill the pie crust with something delicious :) Pictured above is a Lemon Chiffon Pie. My grandma and I made this delectable treat this past weekend for Easter. Look for the recipe in my next post.


Lemon Chiffon Tartlets


*Grandma's Note: This pie crust recipe is versatile. You can cut small rounds out of the rolled-out crust and place them in a mini-muffin pan to make tartlets. Prick the dough with a fork as you would for the normal size pie crust. These little treats are great for parties!


Happy pie making! Thanks again to my grandma for sharing this recipe and her great tips, and thank you for visiting.


-The Delicious Dabbler

Tuesday, April 19, 2011

Cinnamon Rolls


As I mentioned in the previous post, the motivation to make this recipe came from an episode of Paula's Best Dishes on the Food Network. Paula is always cooking when I come from work...so much delicious butter, right when I'm getting hungry for dinner. I was intrigued by the starter used to make these, and honestly, what's not to love about cinnamon rolls? They are a fabulous breakfast, brunch, dessert and/or snack food. Since making these....I have eaten one at every time mentioned, so I prefer the "and" in that sentence.

This recipe was fun to make, and would be a great recipe to make with young children...they could help slather all the ingredients on the dough. I put raisins and pecans into the cinnamon rolls. The raisins added a sweet and chewy component and the pecans added a rich crunch. Happy cinnamon roll making :)


Cinnamon Rolls


Ingredients for the Dough:
-1 c sweet bread starter
-1/2 c granulated sugar
-1/2 c coconut oil (vegetable oil could be substituted)
-1 tbsp salt (I use fine ground sea salt)
-1 1/2 c warm water
-1 tbsp dry active yeast
-6 c all-purpose flour

Ingredients for the Filling:
-1 stick butter, at room temperature
-1 1/2 c dark brown sugar (light brown sugar could be substituted)
-1/4 c + 2 tbsp ground cinnamon
-1 cup chopped pecans
-1/2 cup raisins

Ingredients for Glaze:
-2 c powdered sugar
-1/2 c half and half

Instructions:
1. Attach the dough hook to your electric stand mixer. Mix starter, sugar, oil, salt, water, yeast and flour on low speed setting. Mix until incorporated (2-3 minutes).
2.  Place the dough in a large, buttered bowl and cover with plastic wrap.
3. Let the dough rise until it has doubled in size (2-4 hours).
4. Place the dough onto a well-floured surface. Using a floured rolling pin, work the down into a long, 1/4 inch-thick rectangle
5. Using your hands, spread stick of butter over dough. Coat dough with brown sugar, cinnamon, raisins and pecans. Make sure the filling extends to the edges of the dough.
6. Roll the dough into a tight roll.
7. Using a serrated knife, cut the roll into 2-inch pieces and place into a buttered baking dish.
8. Allow the rolls to rise for an hour.
9. Start the rolls in a cold oven. Bake them at 325°F until they are golden brown (35-40 minutes).
10. In a medium-sized bowl, whisk together the powdered sugar and half and half.
11. While the buns are still warm, evenly cover them with the glaze.
12. Enjoy the cinnamon deliciousness!

Pictures and Tips:


Step 1. Just in case you aren't familiar with the dough hook attachment...here is a picture of what mine looks like. Make sure to scrape down your mixing bowl a few times using a rubber spatula. Also, use your rubber spatula to make sure any flour at the bottom of the mixing bowl gets incorporated.


Step 2. Place the dough into a well-buttered bowl. This is a sticky, sweet, heavy dough....Kind of reminds me of a certain Def Leppard song.


Step 3. The dough should double in size and be very puffy.


Step 4. Place the dough onto a well-floured surface. Emphasis on well-floured...this will really help you when it comes time to roll the dough.  Using a floured rolling pan, work the dough into a long rectangle that is 1/4 thick.


Step 5. The messiest step of all. Here is where little kids could really have some fun. Use your hands to spread the stick of butter over the entire surface of the dough. The heat from your hands will aide in this process. Then, coat the dough evenly with the brown sugar, cinnamon, raisins and pecans.


Step 6. Roll the dough. You want to make as tight of a roll as possible. To do this, pull the dough lightly toward yourself before you roll it. I had to work in sections, from left to right, because the dough was too long to roll all at once. I found it helpful to keep my hands lightly floured so the dough didn't stick to me and tear.
 Here is a picture of my finished roll. You can manipulate your roll size here if you want to. For example, if you want an increased number of small rolls, lightly stretch the roll into a longer shape. You can also freeze the dough at this time....So, if you have a small crowd, perhaps freeze half to enjoy later. If you freeze them, let the dough thaw, and proceed on with the remaining steps.


Step 7. Place the dough into a buttered baking dish. I used a rectangular glass pan for a yield of 24 cinnamon rolls. Choose a baking dish based on the amount of rolls you want to bake. Cozy the rolls up close in the baking dish.


Step 9. Allow the rolls to rise for an hour until they become puffy.


Step 10. Start the rolls in a cold oven. This means that you should not preheat your oven. After you have put the rolls into the oven, turn the oven on and allow it to come to temperature. Bake the rolls at 325°F until they are golden brown.


Step 11. Prepare glaze. Whisk together powdered sugar and half and half. You can really make the topping for these rolls work for you...if you like a lot of glaze, make more. If you like a thicker/thinner glaze, manipulate the amount of liquid.


Step 12. Enjoy! I brought this pan of rolls to my boyfriend's house and shared them with his roommates. The rolls that remained became delicious breakfast and after-work treats. I hope you enjoy making and sharing this recipe.

As always, thanks for visiting.

-The Delicious Dabbler