Wednesday, July 27, 2011

Chocolate Cupcake Toppers


As I mentioned in my last post, one of my good friends is getting married this fall and her bridesmaids hosted a bridal shower for her. I brought the desserts, and jazzed up these mini red velvet cupcakes with Ks (for her future last name) and hearts. These little toppers are really easy to make, and add a touch of fancy whimsy to any dessert. You can use this method to make any topper that goes with the occasion you are baking for.

Chocolate Cupcake Toppers

Ingredients:
- 2 c semisweet chocolate chips

* you can adjust the amount of chocolate depending on how many toppers you need to make
*feel free to substitute in your favorite type of chocolate...dark chocolate is always a personal favorite

Instructions:
1. Using a double boiler, melt the chocolate.
2. Place into a sandwich bag (or piping bag if you have one) and cut the tip off the corner of the bag.
3. Pipe desired designs onto a baking sheet covered with parchment paper.
4. Place baking sheet into the freezer and allow chocolate to harden.
5. Jazz up your cupcakes!

Pictures and Tips:


Step 1. To create a double boiler, bring water to a simmer in a medium-sized sauce pan. Place a heat proof bowl over the top and add your chocolate chips. This method allows the chocolate to melt gently.


Use a spatula to stir the chocolate chips around and help them melt evenly. The melted chocolate will be shiny and creamy.


Step 2. Use a spoon to place the chocolate into a sandwich bag. Seal the bag tightly and work the chocolate into one corner of the bag.


Use a scissors to cut the corner off the bag. The cut you make will help determine the thickness of your decorations, so cut carefully.


Step 3.  Pipe your desired shapes onto a baking sheet covered with parchment paper. Keeping even pressure on the sandwich bag as you squeeze the chocolate out will make this process easier. Don't worry about perfection...the unique lines make these decorations wonderfully homemade.


Step 4. Place the baking sheet in the freezer and allow the chocolate to freeze. You can see the how the chocolate has deepened in color in the above photo. The decorations will come right off the parchment sheet once they have been frozen.


 Step 5. Jazz up your cupcakes!

These little toppers are a great way to incorporate desserts into a theme and to make everything a little more special. Baking is an expression of love, so spread it around with these cupcake toppers. This is a very versatile method to have in your repertoire. See how I put them to work in my next post, featuring Raspberry Chocolate Mousse Tarts.

Happy dabbling,

-The Delicious Dabbler

Monday, July 25, 2011

Cream Cheese Frosting


Last week I was asked to make red velvet cupcakes for my friend's bridal shower. The shower was hosted by her lovely bridesmaids, and I was in charge of the dessert portion of the meal.  Red velvet is the bride-to-be's favorite cake, but not one I was very familiar with. After much recipe researching, I made a batch of these minis. If you delve into red velvet history, you might find that the cake is traditionally made with a custard-based frosting. However, cream cheese frosting is now commonly used and sounded much more appealing to me. Google cream cheese frosting, and your recipe choices will be all over the place...lots of sugar, minimal sugar, sour cream, lots of butter, no butter...etc. I adapted this recipe from Martha Stewart's Cream Cheese Frosting Recipe, and the results were absolutely delicious.

Cream Cheese Frosting


Ingredients
-8 ounces cream cheese, softened
-8 tbsp (1 stick) unsalted butter, room temperature
-1 1/2 c powdered sugar
-2 tsp vanilla

*yields about two cups of frosting

Instructions:
1. Using an electric hand mixer, beat the cream cheese until it is easily passes through the beaters.
2. Add the butter in two, 4 tbsp additions, beating well after each addition.
3. Add the powdered sugar and beat until incorporated.
4. Add the vanilla, beat to incorporate.
5. Frost at will!

Pictures and Tips:


Step 1. Place the softened cream cheese into a medium-sized bowl. Using an electric hand mixer, beat the cream cheese until it passes easily through the beaters.


Step 2. Add the butter in two additions, beating after each addition.


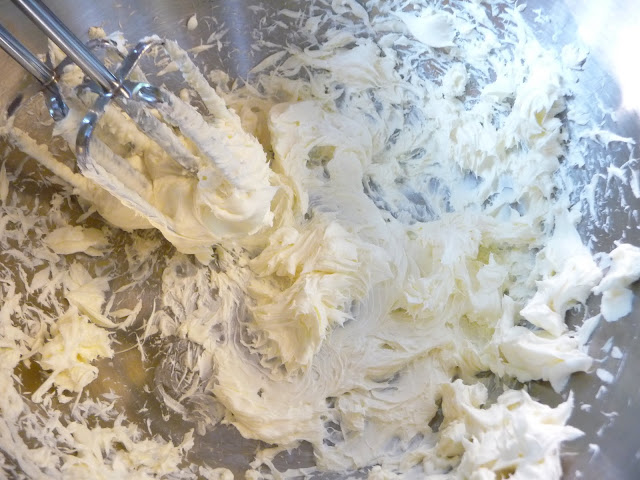
 Steps 3 & 4. Add the powdered sugar and beat until incorporated. Add the vanilla and beat until it is incorporated as well. The frosting will have a smooth, creamy texture.


Step 5. Frost at will....I filled a piping bag to frost the mini cupcakes.


The piping bag and tip gives a lot of control and allows you to make cool patterns, but if you don't have one...you can achieve a similar effect by filling the corner of a plastic bag and cutting the tip of the corner off.


A picture of the finished product :)


I highly recommend this recipe...it has just the right balance of sweetness from the powdered sugar and tang from the cream cheese. It worked great for these red velvet minis, but would also be delicious with chocolate cake or carrot cake.

In my next post, I'll show you how to make cute chocolate cupcake toppers to jazz up your next cupcake endeavor.

Thanks for visiting,

-The Delicious Dabbler

Friday, July 15, 2011

Baking in Real Life


Happy weekend dabblers...so last night I had what I like to call a "baking in real life moment," and thought I would share it with you all. I had a craving for bread after work last night and wanted to mix it up from my usual sourdough making, so I started to make baguettes.

I made the dough.


Let it rise for an hour and a half, punched it down and let it rise for another hour and a half.


Then, I started to form the baguettes. The dough is divided into three parts and patted into ovals.


After some folding and rolling, these beauties were made:


The baguettes needed to rise for another hour and a half, and by this time I was questioning whether or not I was going to be able to stay awake and bake them. "Baking in real life" sometimes means that rise time doesn't exactly coincide with sleep time. Needless to say...I fell asleep without getting these pretty things into the oven. They continued to rise, and fall, over night...the flavor developed into the tangy sourdough that I love, but the bread lost all its lift. It turned into more of a sourdough flatbread than a baguette. But, why not bake them off?


The results. Not at all pretty, but tasty. You can see my test corner in the bottom right of the photo. The dough was soft, chewy and tangy...sourdough flatbread in all its finery. Rather than scrapping the whole thing, I got creative.


 Sourdough flatbread pizzas were born. I rubbed the bread with olive oil and topped it with fire roasted tomatoes, dried oregano, basil and garlic, fresh mozzarella cheese, parmesan cheese, black pepper and red pepper flakes.


I baked the flatbreads at 425°F until the cheese was melted and bubbly.


The finishing touch was fresh basil and oregano. Yum.

This baguette failure turned into an absolutely delicious dinner. Sometimes recipes fail, sometimes you just need to sleep...whatever the reason, remember that if something doesn't work out, you can adapt, or scratch the whole thing and order take out.

Here's to a great weekend full of dabbling successes, whether intentional or not :)

-The Delicious Dabbler

Tuesday, July 12, 2011

Dark Chocolate Mousse


Awhile ago I bought Julia Child's cookbook, Mastering the Art of French Cooking (after seeing the movie Julie & Julia... as any good food blogger would). A dessert craving struck over the weekend, and I found myself paging through Chapter Ten: Desserts and Cakes. To my delight, I found a recipe for Mousseline au Chocolat, or Chocolate Mousse (pg 604). French dessert terminology takes me right back to: Dabbling in Paris: Bread, Butter and Pastries. I adapted my recipe for Dark Chocolate Mousse from Julia Child's recipe...if you are craving chocolate, this is the dessert for you.

Dark Chocolate Mousse


Ingredients:
-4 eggs, separated
-3/4 c + 1 tbsp sugar
-6 ounces dark baking chocolate
-4 tbsp espresso (made with one rounded tsp of instant espresso coffee and 1 c boiling water)
-1 1/2 sticks unsalted butter, room temperature
-1 pinch of finely ground sea salt

Instructions:
1. Bring water to a simmer in a medium-sized saucepan. Prepare a cold water bath. Separate eggs.
2. Beat egg yolks and 3/4 c sugar together until the mixture reaches a light yellow color.
3. Place bowl with yolk mixture over simmering water and continue to beat it until mixture is frothy (approximately 4 minutes).
4. Remove the bowl from heat, and place it into the cold water bath. Continue beating yolk mixture for an additional 4 minutes.
5. Prepare instant espresso. Combine one rounded tsp of instant espresso with 1 c of boiling water.
6. In a separate bowl, add the espresso to the dark chocolate and melt the chocolate mixture over simmering water.
7. Remove from heat and add in butter, 2 tbsp at a time.
8. Beat the yolk mixture into the chocolate until well incorporated.
9. Using the whisk attachment of an electric mixer, beat egg whites and salt until soft peaks form.
10. Add 1 tbsp of sugar and continue to beat until stiff peaks form.
11. Stir 1/4 of the egg whites into the chocolate mixture. Fold in the remaining egg whites in small additions.
12. Place mousse into desired serving dishes and refrigerate for at least two hours to allow the mousse to set.
13. Serve and enjoy!

Pictures and Tips:


Step 1. This step is your prep step...you will use the double boiler cooking method throughout this recipe...so get your water simmering in a medium-sized pot, so it is ready when you are. Prepare the cold water bath and separate the 4 eggs...place the egg yolks into a medium-sized bowl and the egg whites into a small one.


Step 2. This recipe requires a large amount of beating, so prepare for buff kitchen arms...you could also use an electric hand mixer. Beat the egg yolks and sugar until  the mixture reaches a light yellow color. When you lift your whisk out of the bowl, the mixture should slowly ribbon back down into the bowl.


Step 3. Create a double boiler by placing your mixing bowl (*make sure it is heat safe) over a pot of simmering water. This technique allows for gentle cooking. Continue to beat the yolk mixture until it is frothy, about 4 minutes.


Step 4. Remove the yolk mixture from the heat and place into the cold water bath. Continue to beat for an additional 4 minutes.


Step 5. Prepare espresso by combining one rounded tsp of instant espresso coffee with one cup of boiling water. Coffee enhances the flavor of chocolate, so it is a great addition to this recipe. Even if you are not a coffee person, I recommend adding it in. If you are a coffee person and have some left over from making your morning coffee, feel free to substitute in 4 tbsp of strong coffee.


Step 6. Break the dark chocolate baking bar into small pieces and place in a bowl with the espresso. Place the bowl over the same pot of simmering water to again create a double boiler.


Melt the chocolate while stirring slowly with a spatula.

Step 7. Remove the chocolate from heat and add in the butter, 2 tbsp at a time. The heat from the chocolate will melt the butter and the mixture will become smooth and creamy.


Step 8. Add the yolk mixture into the chocolate.


Beat the yolk mixture into the chocolate until smooth.


Step 9 & 10. Using the whisk attachment of an electric stand mixer, beat the egg whites and sea salt until soft peaks form. After you have reached soft peaks, sprinkle 1 tbsp of sugar over the egg whites and continue to beat them until stiff peaks form.


Step 11. Stir 1/4 of the egg white mixture into the chocolate using your spatula. Then, fold the remaining egg whites in small additions. Folding allows you to gently incorporate the egg whites into the chocolate, without deflating them. This will give your mousse the light and airy texture it is known for.


Step 12. Place your mousse into your desired serving dishes. I opted for martini glasses for a cute, individually-portioned dessert. You could also use a large decorative bowl, shot glasses, ice cream bowls, etc...anything that you look like the look of and would fit your occasion. After you have plated the mousse, allow it to set up in the refrigerator for at least two hours.


Step 13. Serve and enjoy! Have fun garnishing the mousse...I used mint leaves for these two little lovelies. Other ideas: toasted sliced almonds, sliced strawberries on the rim of the glass, fresh raspberries, fresh whipped cream, etc.


All of the beating in this recipe made it slightly labor intensive, but it was well worth the effort. The mousse is rich and creamy, and just what every choc-o-holic needs. If there was any question, yes I am one. Happy dabbling!

-The Delicious Dabbler

Friday, July 8, 2011

Cabin Weekend


Hi dabblers. I hope you all had a wonderful holiday weekend. I wanted to follow up and show you some of the delicious cabin meals I got to partake in last weekend. Hopefully this will provide you with some inspiration for the rest of the summer.


The first evening at the cabin, we grilled out over the fire....what a fun way to cook. I love the adventure of cooking outside, the fun, communal vibe, and the fabulous flavor the fire imparts in the food.


Cheese was added to the burgers and then they were tented with aluminum foil to help the cheese melt.


Everyone got to make their own burgers with a variety of toppings....I opted for caramelized onions, guacamole and crumbled blue corn tortilla chips. Yum. The burgers were served with salad and fire potatoes. If you haven't had fire potatoes, I highly recommend them. Thinly sliced potatoes (baby red potatoes pictured above) cooked with butter, onions, garlic and herbs....you wrap all the ingredients in aluminum foil and cook them over the fire. These are also great done over the grill.


After dinner dessert? S'mores, naturally. Everyone has their own s'more style...I like  crispy brown edges all around.


This pictures makes me want to be back around the fire right now. While I'm roasting my marshmallow, I put the chocolate-and-graham-cracker base on a rock next to the fire so the chocolate starts to melt. Delicious.


Of course my uncle had to raise me one marshmallow.


The next evening, my aunt created this fabulous ingredient display for a make-your-own-pizza night. My aunt is a wonderful cook, and the way she presents food always makes me so excited to eat it. This was such a fun dinner, and a great idea for a casual, fun dinner party.


It was fun to watch everyone assemble their pizzas...to see how they put them together and what ingredients they chose. Pictured above is my uncle's creation before it went into the oven.


And after it came out of the oven...it is hard to go wrong with bubbly cheese.


To top our wonderful weekend of eating off, my cousin made this cake to celebrate the 4th of July. It was a rich chocolate cake, and so wonderfully decorated. She told me she checked out my 4th of July post for inspiration. I thought that was awesome...hearing that people have tried my recipes or gotten inspiration from past posts puts a huge smile on my face :) This cake is gluten free and I am planning to ask my cousin to share the recipe in a future post.


Here's to another beautiful summer weekend! Thanks for visiting and happy dabbling.

-The Delicious Dabbler

ps: a bonus photo of a beaver dam from one of our weekend hikes