Friday, December 30, 2011

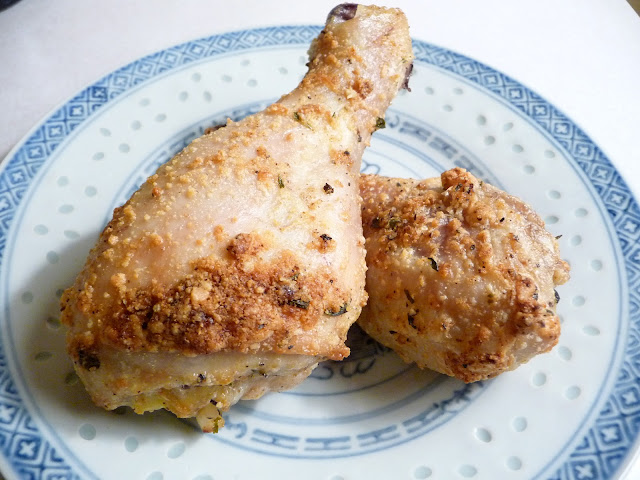
Parmesan Crusted Chicken


Hi dabblers. I can't believe how fast this year has gone by. The end of the semester and the holidays have kept me away from blogging, but I wanted to get a recipe to you before the New Year. This creation is one of my mom's and is fantastically easy and delicious. The parmesan crust gives this oven-baked chicken the delectable crunch of fried chicken. This is a go-to dinner recipe for me and has been given a big thumbs up from my fiance. It would also be great for a casual New Year's gathering with your favorite people.

Enjoy this recipe and cheers to a healthy and happy New Year for you and yours!

Parmesan Crusted Chicken


Ingredients
-5 chicken drumsticks, skin on (you could also substitute your favorite cut of chicken)
-extra-virgin olive oil
-sea salt
-black pepper
-garlic powder
-red pepper (cayenne)
-dried oregano
-parmesan cheese

Instructions
1. Preheat oven to 350°. Arrange roasting rack on a sheet pan and set aside. Gather ingredients.
2. Place drumsticks in a large bowl.
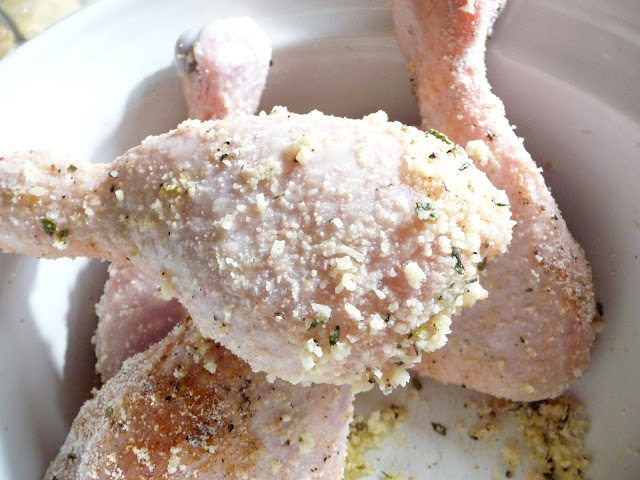
3. Cover drumsticks with olive oil. Sprinkle liberally with sea salt, black pepper, garlic powder, red pepper, oregano, and parmesan cheese. Mix with your hands and thoroughly coat the chicken.
4. Arrange the drumsticks on the roasting rack and bake for approximately 45 minutes, until juices run clear and chicken is cooked through to the bone.
5. Enjoy!

Pictures and Tips:
Step 1. I like to assemble all of the ingredients in advance to make the process of coating the chicken go quickly. Also, when coating chicken, I like to use one hand for mixing the chicken and keep one hand clean for adding further ingredients. You don't want to cross-contaminate (this is also why I have already removed the caps from my spice jars).

Step 2. Place the drumsticks into a large bowl.

 Step 3. Coat the drumsticks liberally with olive oil. This will help the skin to become crispy when the chicken is baked.
 Next, liberally sprinkle the chicken with sea salt, black pepper, garlic powder, red pepper (adjust for your desired heat level), and oregano.
 Add parmesan cheese.
 Mix the chicken with your hands to thoroughly coat the skin. Make sure to collect the parmesan cheese bits that have gathered at the bottom of the bowl and redistribute them to the chicken.
Step 4. Arrange the chicken on a roasting rack (this allows the heat to reach all sides of the chicken evenly) and bake for approximately 45 minutes. The juices of the chicken will run clean when the chicken is cut with a knife and the meat will be white through to the bone.  Adjust the cooking time for the size and cut of your chicken pieces. 
Step 5. Enjoy!

Happy New Year Dabblers. Hope yours is filled with delicious dishes and wonderful people to share them with :)

-The Delicious Dabbler

Sunday, November 6, 2011

Roasted Pumpkin Seeds


Hi dabblers. Before it gets too far away from Halloween, I want to share a recipe for one of my favorite fall snacks...roasted pumpkin seeds. This year I went to two pumpkin carving parties, and left with all the seeds, so I had a lot of roasting to do. Didn't roast your Halloween seeds? No worries, pie pumpkins are filling up the grocery stores for Thanksgiving...so go pick a few up :)

No need for exact measuring in this recipe...adjust it to the amount of seeds you have, and to your desired spiciness level. These seeds make a great, crunchy snack and the cayenne pepper adds a spicy note that makes them addictive.

Roasted Pumpkin Seeds


Ingredients
-pumpkin seeds
-coconut oil
-sea salt
-black pepper
-garlic powder
-cayenne pepper


Instructions
1. Soak pumpkin seeds in water overnight.
2. Preheat oven to 350°F.
3. Drain pumpkin seeds and coat with coconut oil. Arrange in a single layer on pan.
4. Season with sea salt, black pepper, garlic powder and cayenne pepper.
5. Roast in oven, flipping seeds two to three times.
6. Let cool and enjoy.

Pictures and Tips:

Step 1. After you have cleaned out your pumpkins, soak the seeds in water over night. This plumps them up and keeps them fresh for roasting.


Step 3. Drain the seeds in a colander, removing as much water as possible. Return the seeds to the bowl. I then use paper towels to really remove the water...simply submerge the paper towel in the bowl of seeds and allow it to soak up the excess moisture.

Next, coat the seeds with a few tablespoons of coconut oil. Arrange them in a single layer on a pan. I use a pizza pan to roast my seeds so heat and air can reach both sides of the seeds.


Step 4. Season the seeds with sea salt, black pepper, garlic powder and cayenne pepper. I never measure in this process...just enjoy sprinkling. Aim to get a little bit of everything on each seed.


Step 5. Roast the seeds in the oven. After 10-15 minutes, check them. They will be dry on the top, but when moved around on the pan, wet on the bottom. After flipping them, put the seeds back in the oven and continue roasting. After another ten minutes, check the seeds again. I usually flip three times. The seeds are done when no moisture is visible and they are lightly browned and crisp.


Step 6. Remove the seeds from the pan and place into the container of your choice. Cool the seeds and enjoy :)

These seeds are a delicious snack on their own and can also be a great add-in for other recipes....use in place of croutons on soup or salad, or add them to granola bars or fall snack mixes with nuts and dried cranberries.

Happy roasting! Thanks for visiting,

-The Delicious Dabbler

ps. bonus Halloween photos :)


Monday, October 17, 2011

Dessert Skewers

On Friday night, I had plans with friends for a girl's night in with wine and appetizers. I had a busy day and not much time to throw a sweet treat together as my contribution, so these dessert skewers were the perfect solution to my time-crunched dilemma.

I had seen an idea similar to this on Pinterest using strawberries and pound cake, but my local store had angel food cake and raspberries on sale on Friday. This idea is incredibly versatile- you can sub in a different cake type, fruit type, or chocolate type. Tropical theme?...pineapple, mango and pound cake with piƱa colada drizzle.  Struck by a major chocolate-moment?...chocolate cake, strawberries and chocolate ganache drizzle. You can customize this method to your own preferences.

As mentioned previously, I purchased the angel food cake for this dessert, so no recipe today, but if you have the time and want to make your own, here is a link to Martha's.

Pictures and Tips:
A picture of my set up. Store bought angel food cake, raspberries and skewers. You can find skewers in various lengths and thicknesses.

Use a bread knife to cut the angle food cake into small cubes.

Assemble the skewers. I chose to alternate cake/raspberry for visual contrast.

I melted a small amount of dark chocolate and butter in a double boiler. This can be done while you are assembling your skewers, but keep an eye on it so your chocolate doesn't burn.

Drizzle the skewers with chocolate. Don't worry about perfection...this is abstract art :)

And just like that, dessert is made. These skewers are quick and easy to make, and are just the right blend of classy and fun for a party. Plate them up and enjoy :)


Enjoy this inspiration for your next party,

-The Delicious Dabbler


ps. Never forget the importance of "the chef's snack."

Saturday, October 15, 2011

Apple Glazed Pork Chops


Happy fall flavors dabblers :) Last week I was grocery shopping at Seward Co-op (my fiance and I recently joined), and two items were serendipitously on sale: pork chops and apple juice. Apples, apples, apples...one of the best parts about fall. Apple juice, apple cider, apple pie, apple sauce, caramel apples....I love everything apple. Plus, apples are a point of pride at the University of Minnesota, you can read about the fruit breeding program at the U here.

Anyways, in a moment of fall flavor clarity, I purchased both items and turned them into a flavorful dinner for two.

Ingredients:
-2 pork chops, medium thickness
    *take your meat out of the refrigerator and allow it to come up to room      
     temperature before you cook with it....this allows the meat to relax and will give
     the best results
-sea salt, black pepper, dried rosemary and thyme
-extra virgin olive oil
-apple juice

Instructions:
1. Coat the bottom of a medium-sized skillet with olive oil and place over medium heat.
2. Season one side of the pork chops with salt, pepper, rosemary and thyme.
3. When oil is hot, place pork chops seasoned side down into the skillet. Season the other side.
4. Allow to cook until pork chop easily comes away from bottom of the skillet, then flip.
5. After the second side easily comes away, pour in enough apple juice to cover the bottom of the pan.
6. Continue cooking and allow the apple juice to reduce.
7. Serve and enjoy :)

Pictures and Tips:
Step 1. Add olive oil into a medium-sized skillet, just enough to lightly coat the bottom. Place the skillet over medium heat to bring the olive oil up to to temperature.

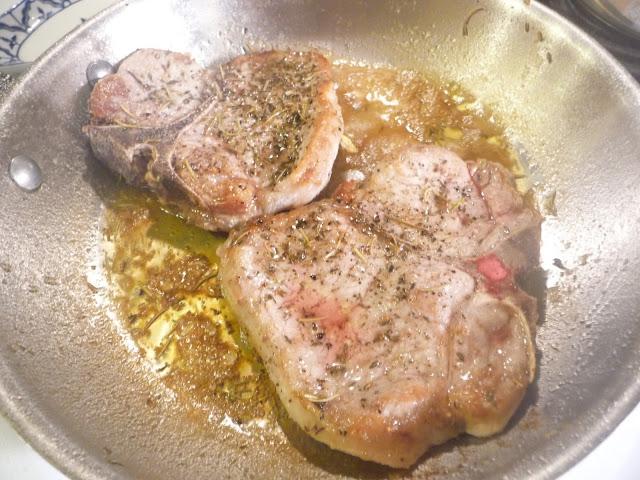
Step 2. While the olive oil is heating up, season the top side of the pork chops. I don't tend to measure when doing things like this, but as you can see from the picture...use enough seasoning so that each bite will have a little bit of salt, pepper, rosemary and thyme in it. Sprinkle away and fun have with it, no need to be exact here.

Step 3. Getting the oil up to temperature is important because you want to get a good sear on the meat and you need a lot of heat to do so. The oil will start to visibly ripple, which is hard to catch on camera...but, you can also test the heat of the oil by dropping a few pieces of rosemary in. If they start to bubble when they hit the oil, it is ready to go.

Add in the chops, seasoned side down. Think about placement before doing so, because you don't want to have to move them around after you put them in the pan or you will tear the meat. Once the chops are in, season the other side.

Step 4. Allow the chops to cook until they easily pull away from the pan. You will notice a great brown color from the meat caramelizing...that is the power of the sear at work. Flip the chops over.
Step 5. When the second side is cooked and comes away easily (this will take less time than the first side), add in your apple juice. Add enough to coat the bottom of the pan. I used about a half of a cup, but you can just eyeball it.
 Step 6. Here is a picture of the apple juice reducing. The juice not only makes a great glaze for the chops, it also steams into the meat, adding moisture and flavor.

Allow the juice to reduce down until it is just coating the bottom of the pan. Remove the pan from heat. 

Step 7. Plate the chops and pour the remaining glaze over the top. Bring your plates to the table, and enjoy!

I served the chops with rainbow chard- sauteed with mushrooms and garlic and topped with parmesan cheese- and sliced Haralson apples.

This dish became a fast favorite in our house. To be honest, I made it again this week by request. 

I love fall cooking and baking...warm and cozy smells throughout the house, pumpkin, squash, spices- fall food is always comforting and feels like home. What recipes are you cooking up this fall?

Thank for visiting, 

-The Delicious Dabbler

Monday, September 12, 2011

Caramelized Onions


After my brother's birthday party, I went home with a bunch of produce from our family's garden (special thanks to my uncles and grandparents!). Faced with the challenge of using boatloads of onions, I decided to caramelize a big batch of them.

Caramelized onions are deliciously sweet, and a wonderful addition to many dishes. They are also very simple to make.

Caramelized Onions

Ingredients:
-3 tbsp extra virgin olive oil
-3 tbsp unsalted butter
-approximately 15 medium sized onions (6 lbs)
-1 tsp sea salt

Instructions:
1. Prep and slice onions into quarters.
2. In a large saute pan, melt butter and olive oil over medium-low heat. Add the onions and salt and cook, stirring occasionally, until the onions are softened and begin to brown.
3. Use them to make something delicious!

Pictures and Tips:

Step 1. Prep the onions. These were fresh from the garden, so they involved slightly more trimming/washing than is necessary for onions purchased from the store. I used a combination of white, yellow and red onions...use your favorite kind, or mix and match.


I may or may not have brought my cutting board outside to maximize what is left of the gettable sun rays...I also find that wearing my sunglasses (or eye wear of any kind) helps reduce the tear-factor that is usually involved with working with onions, especially a large quantity of onions.

I was watching Food Network earlier and Paula Deen had these on. Have you tried them or a similar product? What did you think?


Step 2. Melt the butter and olive together over medium-low heat. I like the combination of butter and olive oil...olive oil has a higher burn temperature, and the butter adds great flavor.


Ready for deliciousness.


Add in the onions and salt. Use a spatula to occasionally stir the onions and break apart the pieces.


Continue to cook the onions over medium-low heat. They will soften and begin to turn a golden brown color. At this point, they are sweet and ready to offer great flavor to a recipe of your choosing.


Step 3. Use the caramelized onions to make something delicious! On this particular evening, I have a major craving for pizza...so the onions became a wonderful pizza topping.


I made whole wheat sourdough pizza crust and the pizzas were cooked out on the grill....if you haven't tried this method, give it a whirl...you can create a cooking environment with a very high temperature (ideal for pizza), and you don't have to heat up your kitchen on an already hot day.

My pizza. Yum.


I hope you enjoy this simple recipe and use it to inspire some fabulous recipes of your own. Some other great uses for these onions: use as a burger topper, combine with parmesan cheese and fresh herbs for a simple pasta dish, or use them to make a delicious tart. Here is one tart recipe idea from Food Network.

Thanks for visiting,

-The Delicious Dabbler

Monday, August 22, 2011

My Brother's 25th Birthday Celebration


Over the weekend, my family got together to celebrate my brother's 25th birthday. The birthday meal included chicken, beef tenderloin, fruit, caprese salad, purple rice salad and bread. It was a lovely meal. I made two desserts for the occasion: Flourless Chocolate Cake and Lemon Cake, both Martha Stewart recipes.

I loved the way both of these desserts turned out and it was fun to have a little variety in the dessert course. The chocolate cake was very rich and indulgent and the lemon cake was light and fun. I made Martha's recipes as instructed, but added my twist by making Raspberry Whipped Cream to top the chocolate cake and to frost in between the layers of the lemon cake.

To make the Raspberry Whipped Cream:
-In a large bowl, use an electric hand mixer to  beat 1 pint of heavy whipping cream until soft peaks form. Continue beating while gradually adding 1/2 c powdered sugar. Once you have whipped the cream to stiff peaks, beat in 1 package (6 oz) fresh raspberries until just incorporated. The cream should be a beautifully light pink color.

 I liberally frosted the top of the flourless chocolate cake and the garnished it with fresh raspberries and mint leaves. The cake recipe was great on its own, and a fabulous gluten-free dessert option, but the raspberry whipped cream really pushed it over the sinfully-delicious edge.

The raspberry whipped cream pulled double duty as the filling in the Lemon Cake. I  loved this recipe...lemon cakes glazed with lemon simple syrup, covered with lemon meringue frosting, and topped with candied lemon slices. The raspberry whipped cream added another flavor dimension and a touch of richness, and I loved the way it all worked together.

It was a wonderful evening overall, and a great way to celebrate the best big brother around!

-The Delicious Dabbler