

Perfect pie crust is an ellusive, but crucial component to any good pie. A pie crust must be light and flaky, but sturdy enough to hold up to filling. It can't be too chewy or tough, or a great pie filling is ruined. I have been lucky enough to eat perfect pie crust for my entire life because my grandma is the best pie maker around.
I have mentioned before that my grandma is the reason I got into baking. I love being in her kitchen and have so many wonderful memories of us making delicious treats together. She has been following my blog and I asked if she would be willing to share this recipe and her pie-making secrets . To my delight, she agreed. Enjoy this recipe and the tips that follow. Thanks grams!
Grandma's Perfect 9" Pie Crust
Ingredients:
-1 1/3 c all-purpose flour
-1/2 tsp finely ground sea salt
-1/2 c + 1 tbsp shortening
-2 to 3 tbsp ice water
*Grandma's Note: This recipe can be doubled for a 2-crust 9'' pie, but should never be increased by more than that. If you are making many pies, make the crusts in individual batches. Making them in bulk will not give you the best results.
Instructions:
1. Preheat oven to 375°F.
2. Carefully measure the flour into a medium-sized bowl. Sprinkle the sea salt over the flour.
3. Add the shortening to the dry ingredients. Using a pastry cutter, cut the shortening into the dry ingredients until the mixture has a gravel-like texture.
4. Add 1 tbsp cold water. Mix the dough with your hands. If the dough comes together, do not add anymore water. If the dough does not come together, add 1 tbsp of water at a time, mixing with your hands after each addition. You should not need to add for than 3 tbsp of water. Form dough into a round ball.
5. Lightly dampen a flat surface and cover it with a long sheet of plastic wrap. Place the dough ball on the plastic wrap and cover it with an additional sheet of plastic wrap.
6. Flatten the dough into a circle with your hands, then roll the dough out until it exceeds the circumference of your pie dish by at least 1/2".
7. Remove the top layer of plastic wrap. Transfer the pie crust to the pie dish and press into place.
9. Bake the pie crust until the edges are lightly golden. (12-15 minutes)
10. Cool the pie crust on a rack until it reaches room temperature.
11. Fill the pie crust with something delicious and enjoy!
Pictures and Tips:


Add another tbsp of water and mix with your hands. I added a second tbsp and was able to shape my dough into a round ball. As I mentioned in the instructions, you should not need more than 3 tbsp of water.
*Grandma's Note: If you feel like your dough is close to coming together completely, add your water in 1/2 tbsp increments to make sure you don't add too much. Also, from this point on, you want to work as quickly as possible so that your dough does not dry out.
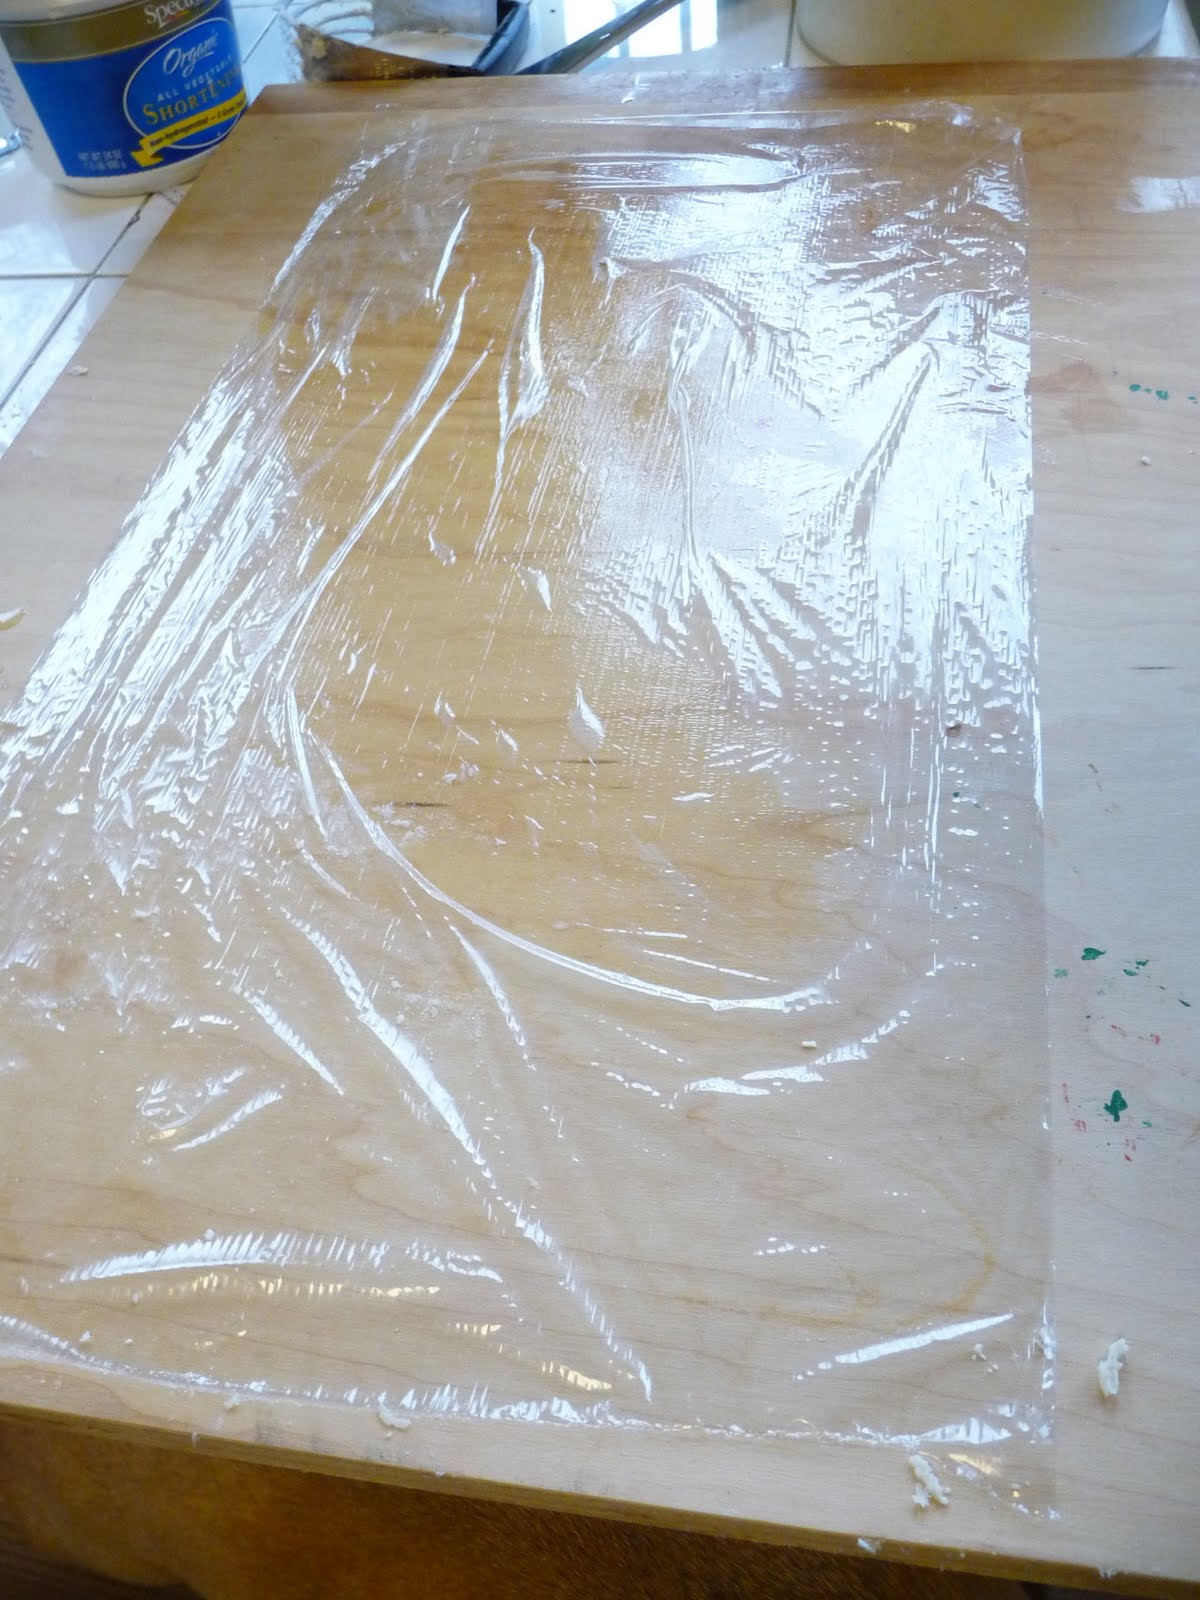
Step 5. Lightly dampen a flat surface and cover it with a large sheet of plastic wrap. Dampening the surface helps the plastic wrap stick and will make your life easier.

*Grandma's Note: This process may seem a bit odd, but it allows you to roll the dough out easily without adding additional flour. If you rolled your dough out on a floured surface, the additional flour would throw off the proportions in your recipe and your crust would become tough. The plastic wrap also makes it easy to transfer the dough into the pie dish.


Step 6. Using your fingers, secure the pie crust to the pie shell by lightly pinching the dough. Work your way around the pie shell.


Lemon Chiffon Tartlets
*Grandma's Note: This pie crust recipe is versatile. You can cut small rounds out of the rolled-out crust and place them in a mini-muffin pan to make tartlets. Prick the dough with a fork as you would for the normal size pie crust. These little treats are great for parties!
Happy pie making! Thanks again to my grandma for sharing this recipe and her great tips, and thank you for visiting.
-The Delicious Dabbler
Hi Tara, It's Grandma Joan - I like your blog and the piecrust recipe. Question--What kind of shortening do you use? Tell Tim "hi". Love, Grandma Joan
ReplyDeleteHi Joan :) Thanks for your comment and question! I use Spectrum Naturals organic all-vegetable shortening. My grandma uses Crisco shortening in her pies. Hope you and Del are doing well.
ReplyDeleteI used your grandma's pie crust recipe for a cherry pie made with our first harvest of cherries from the trees we planted last year. Both the crust and the cherries were wonderful. Thanks for all of the helpful tips!
ReplyDelete